Showing posts with label Desserts. Show all posts

12.22.2011

Holiday Desserts

With Christmas Eve just two days away, I thought I would take a moment to group together some of my favorite holiday dessert recipes, both ones I have tried on the blog, ones others have made for me, and ones I am hoping to try (if my husband is willing to humor me messing up the kitchen all over again--I love you, honey!!). I will include links to each recipe and hope you will forgive the lack of step-by-step directions. Recipes I have yet to try will probably have their own blog entries at a later date.

First, holiday cookies:
Gingerbread men: not going to lie--I go Betty Crocker mix on this one, because let's be honest--the fun is really in the decorating anyway. You still have to make the icing though, so I simply mixed powdered sugar with tablespoons of milk. It comes out just like royal icing, but without the egg that can be dangerous for pregnant guests. I mainly decorated the edges and faces of the gingerbread men and women with icing and Christmas colored M&Ms.


However, I also found a mini-gingerbread man cookie cutter and not only made some bite-sized cookies for my party, but also some cute gingerbread mom cookies for my new and expecting mom friends!


Mint chocolate chip cookies (I've also seen these called Grinch cookies) found here. These are best served warm--when the chocolate and mints are still gooey and delicious. These were a hit at a cookie swap I went to last year and are SO simple to make!


Chocolate crinkles recipe found here. These are my husband's favorite cookie, and they are amazing--their texture and taste is rich and moist, almost like eating a brownie. Added bonus? My husband made them himself this year to help me get all the food ready for our Christmas party. Love that guy.


Miscellaneous dessert recipes from blog:

Peppermint bark


Christmas tree cupcakes


Red wine chocolate cake


Finally, the recipes I have left to attempt are:
Nutella Chocolate Fudge with Dark Chocolate Sea Salt Ganache
Red Velvet Cake Roll
Button Sugar Cookies (not so much a Christmas dessert as a gift for my mom)

Feel free to share any holiday dessert recipes you have tried and loved, and stay tuned for post-Christmas blog updates! Happy holidays and enjoy!

12.20.2011

Red Wine Chocolate Cake

What better way to celebrate May the Fork Be With You's 50th blog post than with cake, chocolate, and wine? Better yet, what if there was a recipe that combined all three of those yummy items with a honey mascarpone frosting? Oh yeah. This exists. And it. is. delicious. Recipe found here.


You will need:
For the cake:
1/2 cup (1 stick) butter, softened
3/4 cup light brown sugar
1/3 cup granulated sugar
1 large egg
3/4 cup red wine
1/4 cup plain yogurt
1 teaspoon vanilla extract
1 1/4 cups all-purpose flour
3 tablespoons cornstarch
3/4 cup cocoa powder
1/4 teaspoon baking soda
1/2 teaspoon baking powder
1/4 teaspoon salt

For the frosting:
1/2 cup (4 ounces) mascarpone cheese
1/2 cup heavy whipping cream
2 tablespoons honey

First, preheat oven to 325 degrees. In a large bowl, cream together the butter and sugars. Add egg and vanilla extract. Finally, add yogurt and red wine.

Next, in a medium bowl, combine flour, cornstarch, cocoa powder, baking soda and powder, and salt. Fold mixture into the red wine mixture, blending well but taking care not to overmix. Pour into greased 5x9 loaf pan and bake for 50-60 minutes. When finished baking, allow to cool completely before frosting.


To make the frosting, combine mascarpone cheese, whipping cream, and honey in a medium bowl and whip using a hand mixer until soft peaks form. Serve on top of cake, and enjoy a slice with a glass of red wine (and an evening reading May the Fork Be With You)!


12.09.2011

Red Velvet Mini-Cupcakes with Cream Cheese Frosting

I was never terribly familiar with red velvet cake. I've always been a straight-up chocolate cake girl, and my family never really made it for me to compare the two. But we were hosting a Christmas party, and what better combination of colors for Christmas than a red base--and green Christmas tree-looking frosting??? (Idea for Christmas tree frosting from Pinterest; recipe for cupcakes from allrecipes). The result was amazing--this was easily the best frosting recipe I have ever tasted, and the cupcakes themselves were so flavorful and chocolate-y that I am looking for additional ways to make red velvet cake in the future. Do yourself (though maybe not your waistline) a favor, and give these a try!


You will need (for 30 cupcakes or 60 mini cupcakes):
For cupcakes:
2 1/4 to 2 1/2 cups flour (the latter amount will make a denser cake)
1/2 cup unsweetened cocoa powder
1 teaspoon baking soda
1/2 teaspoon salt
1 cup butter, softened
2 cups sugar
4 eggs
1 cup sour cream
1/2 cup milk
1 (1 ounce) bottle McCormick® Red Food Color
2 teaspoons McCormick® Pure Vanilla Extract

For vanilla cream cheese frosting:
1 (8 ounce) package cream cheese, softened
1/4 cup butter, softened
2 tablespoons sour cream
2 teaspoons McCormick® Pure Vanilla Extract
1 (16 ounce) box confectioners' sugar
*If desired: green food coloring and sprinkles

First, preheat your oven to 350 degrees. In a medium bowl, combine flour, cocoa powder, salt, and baking soda. Set aside.

In a large bowl, use a hand mixer to cream the butter and sugar together. Add in your eggs one at a time. Next, mix in sour cream, milk, food coloring, and vanilla. Finally, fold in flour mixture, making sure that batter is well-combined, but not over-mixed. Spoon into greased or lined cupcake pans so that each cup is 2/3 full.

For cupcakes, bake 20-25 minutes. For mini-cupcakes, bake 12-15 minutes. They are done when a toothpick inserted in the center comes out clean or when the cakes spring back when touched.

Allow cupcakes to cool and make your frosting. First, cream together butter and cream cheese with a hand mixer. Add sour cream and vanilla. Finally, add the confectioners' sugar in batches (this will keep you from spraying sugar all over your kitchen!). If you want to make Christmas tree frosting, add about a 1/2 oz of green food coloring to the frosting and finish mixing.

To decorate, use a piping bag or ziploc bag with the tip cut off to create a tree-shaped mound of frosting on top of each cupcake. Top with round sprinkles and a star-sprinkle on top for a delicious Christmas dessert!


As you can see, these mini cupcakes make a great addition to any holiday spread--I know I had more than a couple at our party. So give them a try, and I hope that you and your guests enjoy them. Happy holidays!


12.02.2011

Peppermint Bark

One of the first things I watch for around the holidays is Ghiradelli's peppermint bark squares. Maybe it's because they are seasonal and limited, a la McRib, or maybe it's because they are minty chocolate goodness; either way, my younger sister and I usually have some on hand during our Black Friday outings. So this year, I decided to see if I could make my own. Turns out, it's not that hard--and it's far cheaper and chocolate-ier than Ghiradelli.


You will need:
12 oz. dark chocolate (I used Dove--it's the only dark chocolate I really love)
12 oz. white chocolate (I used Baker's--it melts easiest)
24 hard peppermint candies

Line a jelly roll pan with parchment paper. In a glass bowl, microwave your dark chocolate in 15-30 second intervals, stirring in between each microwaving to prevent burning. When completely melted, pour onto parchment paper. Using a spatula, make sure that the melted chocolate covers the entire bottom of the pan evenly. Place in the refrigerator to harden for 10-20 minutes.

In the mean time, unwrap your peppermint candies and place in a ziploc bag. Use a rolling pin to break the candies, hitting and rolling until you have mostly peppermint dust and a sprinkling of larger peppermint pieces in the bag. Alternately, you could place the candies in a food processor. I just hate the dishes and like the arm workout of the rolling pin.

Microwave your white chocolate in the same way that you microwaved the dark, then fold in the peppermint dust and pieces until well-mixed (note: you can also strain out the large pieces and sprinkle those on top at the end if you would like the peppermint bark to look even prettier; the inside of my stomach, however, is not as discriminating). 

Finally, pour the peppermint-y white chocolate over the top of the refrigerated dark chocolate layer. Be sure to work quickly and carefully to spread the white chocolate layer over the dark chocolate layer, as the heat of the melted white chocolate will start to melt the refrigerated dark chocolate layer below. 

Place back in the refrigerator to harden for another 30-60 minutes and remove from parchment paper. (Note: you probably shouldn't eat the giant piece of peppermint bark--but I liked knowing that I could).


Break into pieces and enjoy!


10.10.2011

Caramel Apple Cider Martinis

My lovely sister and cousin came out for dinner and drinks a couple of days ago, and I asked them what they would like me to make. My cousin suggested an apple martini, and I came upon this lovely recipe. And, since my grocery store has been making these huge, sugary, mouth-watering looking caramel apples this month, a drink that could provide the same taste seemed like a necessity. It did not disappoint and tasted very much like dessert in a glass!


You will need the following (per martini):

1/2 cup of apple cider
1 oz. vodka
1/2 to 1 oz. butterscotch Schnapps (depending on how sweet you like your drinks)
Ice
Apple (cut into slices)
Lemon juice

First, prepare your garnish by chopping your apple into thin slices and soaking the slices in the lemon juice (this way, they will not turn brown).

Next, pour the cider, vodka, Schnapps, and ice into a martini shaker. Shake well and pour into a chilled martini glass. Place apple slice on the glass rim for decoration and serve! This is my new favorite fall drink by far, and I hope you enjoy it (responsibly) as much as we did!

Pumpkin Cupcakes

And now to continue the pumpkin goodness with pumpkin cupcakes. I found a recipe here for pumpkin cupcakes that come with a cream cheese frosting. Not only were they amazing, but they reminded me of these amazing pumpkin bars I used to get from a restaurant called The Brown Bag--the cakes were moist with a subtle spice, and the cream cheese frosting was sweet and cinnamon-y and delicious. I hope you give them a try!


  • You will need the following:

  • Cupcake ingredients:
  • 2 1/4 cups all-purpose flour
  • 2 teaspoons ground cinnamon
  • 1 teaspoon ground nutmeg
  • 1/2 teaspoon ground ginger
  • 1/2 teaspoon ground cloves
  • 1/2 teaspoon ground allspice
  • 1/2 teaspoon salt
  • 1 tablespoon baking powder
  • 1/2 teaspoon baking soda
  • 1/2 cup butter, softened
  • 1 cup white sugar
  • 1/3 cup brown sugar
  • 2 eggs, room temperature
  • 3/4 cup milk
  • 2 cups pumpkin puree
  •  
  • Cinnamon Cream Cheese Frosting Ingredients (for 12-15 cupcakes--see below):
  • 1 (8 ounce) package cream cheese, softened
  • 1/4 cup butter, softened
  • 3 cups confectioners' sugar
  • 1 teaspoon vanilla extract
  • 1 teaspoon ground cinnamon


First, sift the flour, salt, baking soda and powder, and spices together in a medium bowl. Be sure to use the spices listed--I know it sounds tempting to use pumpkin pie spice (which I did the first go around--it seemed logical, as the types of spices used are the same), but the ratio of the different spices will be off and you will lose some of the spice taste if you substitute. So try to use the ones listed if you can.

Next, you will combine the cupcakes' wet ingredients in a large bowl. Start with the butter and sugars. When well mixed, add the eggs one at a time until incorporated. Finally, add the milk and pumpkin. Add the mixture of dry ingredients a little bit at a time to the wet ingredients until fully incorporated.

Finally, preheat your oven to 350 degrees and grease two cupcake pans. Using a cookie scoop, pour the cupcake batter evenly into the pans (this recipe will make 24 total). Bake for 18-22 minutes or until golden (mine were done at 19 minutes).

While your cupcakes are baking, prepare your frosting. Using a hand-mixer, combine your package of cream cheese, butter, vanilla extract, and cinnamon. When well-combined, begin adding in your sugar in half cup increments. While the recipe suggests using 3 cups of confectioner's sugar, I would taste your frosting after two cups, then decide if you like your frosting a bit sweeter or a bit more savory. I liked mine sweet, so I used the full 3 cups, but you can definitely add less if you are content with the flavor.

Allow the cupcakes to cool completely before frosting (note: I only made enough frosting for 1/2 the cupcakes; since I was not going to eat 24 cupcakes in a few days--even I can't accomplish that--I chose to freeze the other 12 for a future week's dessert. Feel free to double the frosting recipe if you can use all 24 at once, though!).


All in all, these cupcakes turned out moist and yummy, and, with a mug of hot apple cider, they are the perfect way to end a fall day. Enjoy!

9.04.2011

Blondies

So, we finally ran out of cake balls and needed a new dessert. My husband said he would be happy with cookies, and since I know he also loves brownies, I decided to try to make blondies (or blonde brownies--sort of a cross between a brownie and a cookie). See below:


I found a recipe here. I took the recommendation of some of the posters on this recipe and doubled the recipe, so if you want a 9x9 sized pan worth of blondies, use the ingredient amounts below. If you'd prefer a 9x13 sized pan, double the ingredient amounts below:


  • 1 cup all-purpose flour
  • 1/2 teaspoon baking powder
  • 1/8 teaspoon baking soda
  • 1/2 teaspoon salt
  • 1/3 cup butter
  • 1 cup packed brown sugar
  • 1 egg
  • 1 tablespoon vanilla extract
  • 2/3 cup semisweet chocolate chips


The procedure for making this recipe is, not surprisingly, very similar to making chocolate chip cookies. So, first, preheat your oven to 350 degrees and sift your dry ingredients (minus the brown sugar) together into a medium bowl.

Next, melt your butter and pour into a large bowl. Add brown sugar to this bowl and mix well to combine with the butter. Make sure to get all the brown sugar lumps well integrated. Add the egg and vanilla to the brown sugar mixture.

Add the flour mixture a little at a time to the brown sugar mixture, mixing well to prevent the formation of lumps. Finally, mix in the chocolate chips.

Grease a baking dish or spray with cooking spray to prevent sticking (9x9 for the recipe as listed; 9x13 for a double batch). Pour blondie batter into the baking dish, and bake for 20 to 25 minutes. When the blondies begin to set and turn a golden color, they are done! Cut into 24 slices, and enjoy the flaky, buttery blondies!


Chocolate Chip Cookie-PB Cup Brownies

And now for the grand finale of the girls night recipes, the turducken of baked goods, the most sinful dessert you will ever consume: the cookie dough peanut butter cup brownie:


I found this recipe here, through food gawker or one of those other compilations of blog postings, and knew that this needed to come out of my kitchen. And oh my goodness was it worth it! It was so decadent that a one inch square was enough to satisfy--and of course, you're actually getting three desserts in one, so how could it not?

Here are the ingredients you will need:

1 cup (2 sticks) butter, softened
1 cup sugar
¾ cup brown sugar
2 eggs
1 Tbsp vanilla extract
2 ½ cups flour
1 tsp baking soda
1 tsp salt
2 cups milk chocolate chips
18 Reese’s Peanut Butter Cups
1 box family size brownie mix (9 x 13) (and the accompanying ingredients listed on the box)

First, preheat your oven to 350 degrees, and get ready to make the cookie layer. Beat together butter, sugar and brown sugar. Add eggs and vanilla. In a separate bowl combine flour, baking soda and salt, then add dry ingredients to dough. Stir in chocolate chips. Spread dough into a well greased 9 x 13 inch pan. 


Next, add a layer of Reese's peanut butter cups. The recipe didn't specify size, so I used the fun-size ones. Push the peanut butter cups directly into the cookie dough, three rows of six to ensure peanut butter in every bite!


(I had extra...it seemed wrong not to find a place for them :p).


Finally, make the brownie mix according to package directions, and pour over the top of the cookie dough/peanut butter cups, making sure every inch is covered with brownie goodness.


Bake in the oven for 45-55 minutes (mine were done after about 45 minutes) and allow to cool for at least fifteen minutes before cutting, as the chocolate from the Reese's is a bit melty. Once the wait is up, cut the brownies, taste, and die of pleasure (or, you know...stick around for a second brownie ;)).


I mean really--do you see the layers in this thing?? Stop drooling now and go make these! Enjoy!! :)

Cake Pops: Funfetti Cake Ball Edition

Yay for long weekends! Since I have some extra time, let me continue with my girls night recipes! Since my cake pops were so tasty the first time I made them, I decided to try making them again with a different flavor (and without the sticks). So, I decided on funfetti cake mix with funfetti frosting (i.e. vanilla frosting with pastel-colored sprinkles). You can look at the cake pops link for the recipe and instructions, but I wanted to add a few more pictures for clarity (and appeal to the taste buds!).

First, this is what the cake balls look like prior to being covered in chocolate: not too pretty, a bit rough around the edges, although I love that you can see the little multi-colored sprinkles characteristics of all funfetti cakes:


Here they are after having been dipped in chocolate and sprinkles! I think these looked visually more appealing than the red velvet ones...or maybe they just look more fun with the multiple colors:


At any rate, while I LOVED me some chocolate-y red velvet cake pops, the light, almost lemony white funfetti cake balls are my new favorite. I hope you give them a try!

7.22.2011

Cake Pops!

The last couple of days, I have felt inundated by images of cupcakes. (OK, so I looked in a magazine advertising cupcakes, and Paula Deen had that Hello, Cupcake! lady on her show--it's still a sign from the universe, gosh darn it!) So what better way to end a Friday afternoon than with some baking? Unfortunately, I recently began dieting, and the caramel corn cupcake recipe I was drooling over did not seem diet-friendly. So, I opted for something in a smaller, more diet-friendly size. And thus I give you...the cake pop.


Before starting, I looked at various cake pop designs. I figured I would use this first foray into the cake pop world as an introduction to basics, and just try to make something that looked like this:


The goal was to one day work up to something like this (and be sure to look at the rest of Bakerella's website--those cake pops are CRAZY awesome). Yay Star Wars pops!


The basic posed a few challenges of its own, however, so I am going to post what I did first and then post my suggestions for what I could have improved on at the end.

So, let's get to it: my basic cake pop. I'll be honest: I did the lazy baker's version. As suggested by recipes here and here, you can buy a box of store cake mix, a container of pre-made store frosting, a package of candy melts/baker's chocolate/almond bark, and pre-made decorations of your choice--nothing needs to be made from scratch. Add a box of lollipop sticks and a piece of styrofoam (to stick your cake pops into as the chocolate sets) from your local hobby store (i.e. Michaels, Hobby Lobby), and you're done.

I selected a box of red velvet cake mix, container of cream cheese frosting, and baker's white chocolate.
PLEASE PLEASE PLEASE, when it comes to your choice of chocolate for the chocolate shell, buy the baking chocolate, almond bark, or candy melts, NOT the chocolate chips. The chocolate chip bags promise that you can simply melt the chips and add some shortening...and while I am more than willing to admit that I could have microwaved incorrectly, my chocolate chips came out a congealed mess. My Baker's chocolate? Came out perfectly. Either way, you save yourself a step.

But I'm getting ahead of myself. Step #1: Make your cake according to package directions.

When finished, allow the cake to cool on the counter for 30 minutes. Next comes the fun part. See your lovely, oh-so-perfect cake? Time to destroy it! Using a spoon, break up the cake into crumbs, starting in the middle of the cake and stopping just short of the cake's edges (these are a bit tougher, so I just removed them to keep my cake crumb pile nice and soft).
Scoop in your frosting (you can do all of these steps in the pan you baked the cake in!), and use your spoon to integrate it into the cake crumbs so that they are evenly moistened and stick together. Hint: continue to use your spoon here. I was tempted to use my hands, but the mixture sticks to your hands and makes further integration difficult. When it's all mixed together, cover the cake/frosting mix, and place in the refrigerator for 3 hours or longer.

Cake balls can fall apart easily, so be sure to give the cake mix its fridge time. When the 3 hours are up, remove the cake from the fridge, and take out a baking sheet and line with wax paper--it's time to make the cake mix into balls! If you have one, a small ice cream scoop or melon baller helps you to make your cake balls easily and uniformly-shaped. If not, use your hands to roll pieces of the cake mix into balls about an inch, inch and a half big. The recipes suggest that you should have about 36 cake balls (I had 42). When all your cake balls are formed, place the baking sheet with the cake balls into the freezer for one hour.

And now, here is the challenging part: the chocolate shell, lollipop stick, and decorations. The way the recipes tell you to accomplish the final transformation from cake ball to cake pop is as follows:
1) Microwave or melt your chocolate over the stove (in a glass bowl atop boiling water).
2) Dip the lollipop stick in the chocolate and then stick the chocolately-end into a cake ball (the chocolate should act as glue to keep the cake ball on the stick).
3) Dip the cake ball in the melted chocolate to cover it in the chocolate shell.
4) Stick the completed cake pop in the styrofoam and allow the chocolate shell to set.
5) Decorate as you desire with sprinkles (do this BEFORE the chocolate sets) or with a drizzle of a different chocolate (i.e. white chocolate over dark chocolate or vice versa).

I followed these instructions and ended up with several lovely cake pops. See, evidence:


And, they were tasty. However, I had a few that simply slipped down the lollipop stick, and there was the congealed chocolate chip incident I alluded to earlier. My suggestions? 
1) Again, avoid the chocolate chips!!! Get the chocolate that was destined to become a candy shell. It will feel fulfilled, and you won't be irritated.
2) Either make the cake balls about half the size as that specified above (to reduce the weight on the stick) OR put the cake balls back into the freezer once you've inserted the sticks to allow them to set awhile OR lay the cake pops sideways as soon as the chocolate is set to reduce the weight on the stick. 


Follow these steps (with the modifications suggested above), and I know your cake pops will be fabulous! Enjoy!

7.15.2011

Homemade Doughnuts!

One of my guilty slack-off pleasures as a newlywed is to troll www.thenest.com: a website with information on housing, cooking...and politics/current events. An unexpected combo to be sure, but it keeps me entertained. One of the message board posters there had a plate of delicious-looking homemade doughnuts in her signature, and it looked like something I needed to try! I located a recipe here: http://allrecipes.com/recipe/crispy-and-creamy-doughnuts/detail.aspx

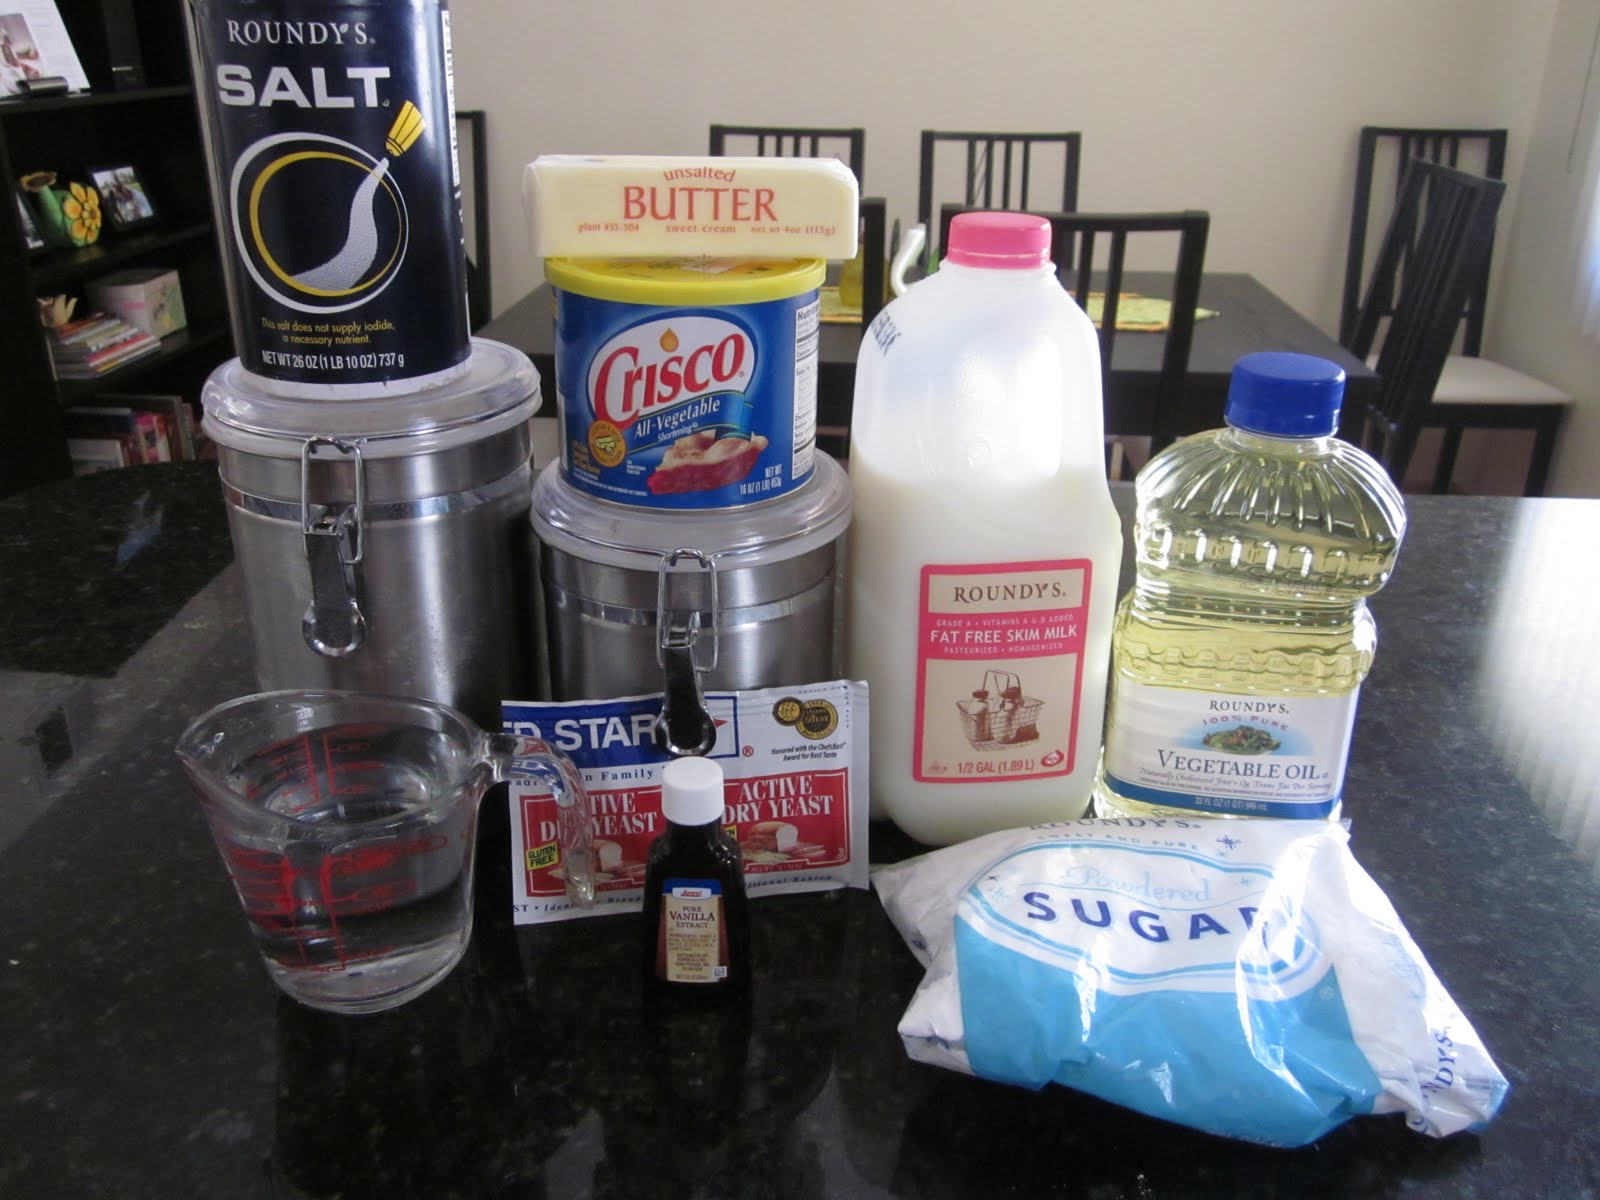
Now, these donuts come out more like a standard Dunkin Donut, if you have those in your area (i.e. a bit lighter than a cake donut). This recipe also only calls for glazed donuts; I had a taste for cinnamon sugar ones, since my husband and I often buy these from our local farms/pumpkin patch type places, and they are always SO good! So, I will tell you how to make both! First, the ingredients:


  • Dough
  • 2 (.25 ounce) envelopes active dry yeast
  • 1/4 cup warm water (105 to 115 degrees)
  • 1 1/2 cups lukewarm milk
  • 1/2 cup white sugar
  • 1 teaspoon salt
  • 2 eggs
  • 1/3 cup shortening
  • 5 cups all-purpose flour
  • 1 quart vegetable oil for frying
  •  
  • Glaze
  • 1/3 cup butter
  • 2 cups confectioners' sugar
  • 1 1/2 teaspoons vanilla
  • 4 tablespoons hot water or as needed

Cinnamon-Sugar topping
1/3 cup butter
3/4 cup white granulated sugar
2-3 tbs cinnamon (or more, to your taste)

To begin, cut open the yeast packets, and sprinkle them over the warm water. Let the mix sit for five minutes or until it becomes foamy. Now, this was my first time cooking with yeast, and I learned a few things about it. One, temperature is hugely-important. Yeast needs the water to be warm and it will need a warm environment in the kitchen to rise at a decent pace. So, you may want a 75-80 degree kitchen today (I stupidly had my air conditioning turned on full blast on a 70 degree day, and my dough took a good hour and 45 minutes to rise. Learn from my mistake!!). Second, yeast is a fungus, and so it is a bit smelly. Just keep imagining fresh doughnuts in your head as you smell the yeast-i-ness, and you will make it through.

Next, mix the following in a large bowl: the yeast mix, milk, sugar, salt, eggs, and shortening. Use a whisk to make the integration of the shortening easier. When all is combined, add in the flour to the mix in 1/2 cup intervals, again whisking to remove any lumps. You can also use a hand mixer set on low speed if the spoon isn't working for you (I just figured mixing by hand would help cancel out the future doughnut calories :p).

When it is well-mixed, knead the dough for about five minutes, then place it into a greased bowl and cover lightly (saran wrap works well here--just be sure to spray with non-stick spray and cover loosely). Finally, leave the dough alone to rise. It will be ready for action once it is about double its original size and will leave an indentation if touched (if it springs back into its original place when touched, it needs more time).

Once the dough has doubled in size, it is, as they say, time to make the doughnuts! First, prep your space. The recipe calls for you to roll the dough out onto a hard surface, and the dough was still obstinately sticky for me when I uncovered it. So, I taped some saran wrap to my counter top and sprayed it with non-stick spray and sprinkled it with a bit of flour. I highly suggest doing something similar to keep your dough from sticking. Then, place your dough on this surface, cover it with a piece of wax paper, and roll out your dough with a rolling pin on top of the wax paper, until the dough is a 1/2 in. thick (be sure to use the wax paper to keep the dough from sticking to the pin). Use a doughnut cutter to make your dough into the well-loved doughnut shapes (or, as I did, a drinking glass and a small, circular piece from a pastry bag--cooking is all about innovation after all). Finally, allow your doughnuts to again double in size until they look like the ones below:


Finally, it's time to cook the doughnuts and make your toppings. I made the doughnuts first and then went back to make the glaze and such after--the doughnuts fry up very fast, so you may want to devote all your attention to them first. Heat the oil in a skillet (or a deep fryer if you have one) until it reaches 350 degrees (or until a wooden spoon placed in the center of your oil starts to have little bubbles coming up around it--in case you don't have a thermometer). Using a spatula, slide the donuts (2-3 at a time) into the oil, flipping them over as soon as they achieve a light golden color on one side. Once they are golden on each side, remove them and set them on a wire rack to cool (just be sure to place a cookie sheet underneath to catch the mess!).

Toppings are up to you, but here is a glaze option and a cinnamon-sugar option. For the glaze, melt the butter in a saucepan over medium heat, and then add in the confectioner's sugar and vanilla. This is going to thicken up and become frosting-like in consistency, so you will need to add a tsp or more of hot water to thin it out. A little goes a long way, so be sure to only add one tsp at a time until the glaze is thin enough to be drizzled over the doughnuts. Then, simply drizzle over the doughnuts as they cool on the wire racks, and feel free to add fun embellishments like sprinkles!

The cinnamon sugar topping is even easier. Simply mix together your sugar and cinnamon in a bowl and melt the butter in a separate dish. Brush the butter onto the top of the doughnuts and place them into the cinnamon sugar mix--the butter will act as a glue to keep the cinnamon and sugar on the doughnut. Cover the other side of the doughnut in butter and dip the other side in the mixture. (Alternatively, you can place the cinnamon and sugar in a paper bag and shake it to cover all surfaces of the doughnut). These were my favorite, though the glazed were very good, too.

And the final result: time-consuming, but oh so yummy! Enjoy!


6.13.2011

Strawberry and Chocolate Ganache Tart

Several months ago, I caught an episode of Martha Stewart's show where Martha and a guest were making tarts. The process appeared to be time-consuming and unnecessarily difficult (i.e. the butter had to stay super cold, the dough could not be over-processed, etc.), but the tart pan looked so cute with its floofy little edges and such that I figured I could weather the challenge and make one. A few weeks after that, a random trip to Marshall's led me to a $10 tart pan (seriously, check them out for affordable kitchen goodies--I always find something amazing for my recipes there!). And finally, last week marked the end of the school year for me, giving me the free time needed to bake. Which brings us to the strawberry and chocolate ganache tart!

Now, most tarts are fruit-based, but I was not about to sacrifice my chocolate addiction in the interests of recipe purity (or, you know, health), so I found a gorgeous recipe for a chocolate cherry tart here: http://hotpolkadot.com/2011/06/09/thick-as-thieves/. I had to modify the recipe slightly because 1) I could not find hazelnuts in my grocery store and 2) my husband hates cherries. So, I substituted almonds (for consistency) with a spoonful of Nutella (for flavor) to replace the hazelnuts and strawberries for the cherries. Here were my ingredients:

First, you make the tart shell. The shell is the annoying (and time-consuming) part of this recipe, but I promise it will be worth it!

Shell--Phase One (because tart-making is not a one-phase affair!):
-Cut 1 stick (or 1/2 cup) and 1 tbs of butter into pieces and place in freezer
-Grind 1/4 cup almonds with 1/2 cup powdered sugar in a food processor 
-Add 1 cup flour, 1/4 cup cocoa powder, and 1/4 tsp salt and pulse together until mixed
-Add in frozen butter pieces and pulse until the mixture resembles course crumbs
-Add in a tbs of Nutella and one egg and pulse until the mixture begins to come together
-Remove from food processor, wrap in plastic, and refrigerate for at least two hours

Shell--Phase Two:
-Remove tart dough from refrigerator and let it sit out for 10-15 minutes. You want it cold, but working with the dough immediately is like trying to flatten a rock. 
-While waiting, preheat the oven to 375 degrees, cut two sheets of wax paper, and get out your tart pan and rolling pin. Butter your tart pan or spray it with a non-stick spray to prevent sticking.
-Once the waiting period is up, unwrap your dough and place it between the two pieces of wax paper. You want to roll the dough out so that it is about 15" in diameter, and keeping it in between the pieces of wax paper will keep it from sticking!
-When finished, remove the top sheet of wax paper, and do your best to center the tart dough above the tart pan. Place the dough inside the tart pan, pushing the dough into the corners and CAREFULLY removing the remaining piece of wax paper. The dough will have warmed up a bit here, and I know I caught myself swearing at it at least twice while attempting to keep the dough in one piece, but if you are patient, you will have a lovely soon-to-be shell when finished!
-Fold excess dough back along the edge of the tart pan to form a double crust, PIERCE THE DOUGH with a fork in several places to keep it from rising, then place in the freezer for 30 minutes. When done, it should look something like this:

Shell--Phase Three (the easiest one!):
-Butter or spray a sheet of aluminum foil and fit it snugly inside of the tart pan, making sure to cover the entire shell.
-Bake in the 375 degree oven for 20 minutes with the foil on
-Remove foil and bake for another 10 minutes
-When finished, remove the pan from the oven and set it on a cooling rack (I also put my cooling rack with the tart pan into the refrigerator, since I wanted it to cool a bit faster)

And finally, the filling--the easiest and best part of the whole recipe. You can do a lot of the prep work for this while your tart is cooking/cooling:
-Chop up 8 oz. of semi-sweet chocolate (Ghiradelli is amazing, but Baker's is more affordable and still tasty). Pour into a heat-proof bowl and let it sit.
-Mix 3/4 cup of heavy cream and 2 tbs of butter in a sauce pan and bring to a boil.
-Remove the cream and butter from the heat and pour over the chopped chocolate. Cover and let sit for 5 minutes.
-Whisk the chocolate into the warm cream after the 5 minutes are up. Congrats! You have made your ganache, which should resemble an especially shiny chocolate pudding. Wasn't that insanely easy after all that shell nonsense?
-Pour the ganache into the COOLED chocolate tart shell and decorate with fruit of your choosing (you can also dust with powdered sugar or cocoa powder).


To conclude: is the shell a royal pain in the rear end? Absolutely. But is it worth the first bite of chocolate decadence and fresh summer berries? Absolutely. Enjoy!