Showing posts with label Breakfast. Show all posts

11.24.2011

Cinnamon Rolls

My amazing husband turned 28 this past November 21st. So first, let me again wish a very happy birthday to the world's greatest hubby (as should you, reader, since he suggested this blog in the first place!).

Now then. I decided to make some cinnamon rolls for my husband's birthday breakfast, as he LOVES those Cinnabon cinnamon rolls they sell at the mall. It's been awhile since I've had a Cinnabon, but I think that these are a bit less dense than Cinnabon--though every bit as delicious. Huge, soft, cinnamon-y, and with loads of gooey frosting, these are sure to become a staple in our breakfast line-up! (And if you can't eat 16 at once, you can freeze them for future breakfasts, too!). Original recipe found here.


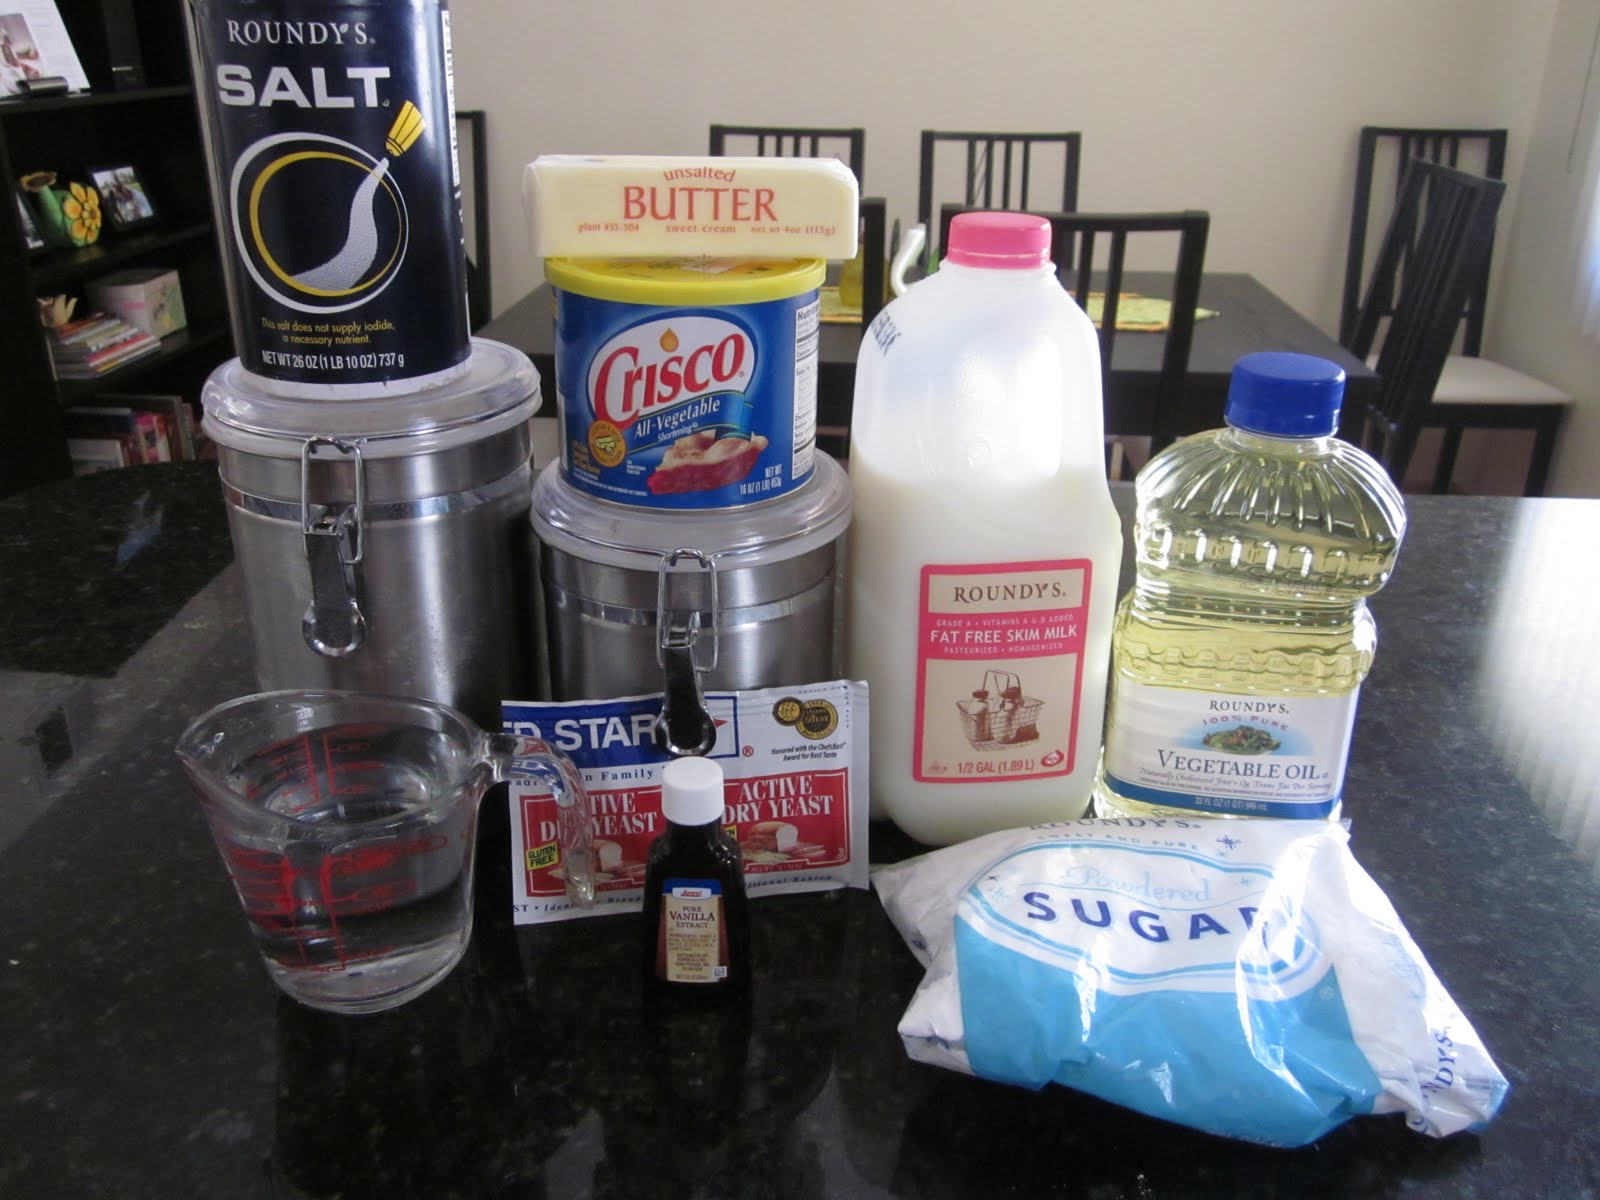
 You will need:

For dough:
1/4 cup warm water
1/4 cup butter, melted
1/2 (3.4 ounce) package instant vanilla pudding mix
1 cup warm milk
1 egg, room temperature
1 tablespoon white sugar
1/2 teaspoon salt
4 cups bread flour
1 (.25 ounce) package active dry yeast

For cinnamon filling:
1/4 cup butter, softened
1 cup brown sugar
4 teaspoons ground cinnamon
3/4 cup chopped pecans (optional: I did not use these)

For frosting (doubled from the original recipe--I like a lot of frosting):
1 (8 ounce) package cream cheese, softened
1/2 cup butter, softened
2 cups confectioners' sugar
1 teaspoon vanilla extract
3 teaspoons milk

First, add yeast to warm water (be sure the water is warm--the yeast needs warm temperatures to activate). Set aside for ten minutes or until it becomes foamy. Meanwhile, cream together the pudding, butter, and sugar. Add milk, egg, and vanilla. Add the yeast mixture. Finally, add the salt and flour, one cup at a time until combined. Knead by hand on a floured surface until dough is elastic. Place dough in an oiled bowl for an hour and allow to rise until double in size.

While the dough is rising, prepare the filling. Cream together butter, sugar, cinnamon, and, if desired, pecans or raisins. Set aside.

When dough is ready, roll out the dough into a 17x10 inch rectangle. I am terrible about guesstimating sizes, but this is about the size of a large cutting board. Sprinkle the cinnamon filling on the inside of the rectangle. Next, roll the dough from the longer side until you have a cinnamon roll log. Cut into 16, one-inch slices and place in a greased pan for an additional hour, until the rolls have doubled in size. (You may want to refrigerate the rolls first to make cutting a bit easier).

Bake cinnamon rolls at 350 degrees for 12 to 16 minutes. When they come out of the oven, the dough should be firm but not brown and look something like this:


Finally, prepare the frosting. Cream together the butter and cream cheese. Add milk and vanilla extract. Then, in batches to avoid a sugar explosion, add in the powdered sugar until the frosting thickens. Spread liberally over all cinnamon rolls while rolls are still warm. See below:


And that's all there is to it! With the wait time for the dough rising, the process does take a few hours. BUT, most of it is not active cooking time, and if you have a family of four, you can enjoy delicious, homemade cinnamon rolls four times for only one day's worth of cooking. And since the husband ate two, the recipe passes the seconds test--so you won't regret the effort once you bite into one! So, break out your rolling pin and inner baker, and enjoy!


10.17.2011

Bran Muffins

Every now and then I feel bad posting recipes that aren't the healthiest for you--only every now and then, but still--so I figured I would post one of the healthier recipes I found: a breakfast classic, the bran muffin. Full of fiber and homemade goodness, these bran muffins make a perfectly healthy breakfast option--and they are tasty, too!


You will need:

  • 1 1/2 cups wheat bran
  • 1 cup buttermilk
  • 1/3 cup applesauce
  • 1 egg
  • 2/3 cup brown sugar
  • 1/2 teaspoon vanilla extract
  • 1 cup all-purpose flour
  • 1 teaspoon baking soda
  • 1 teaspoon baking powder
  • 1/2 teaspoon salt
  • (You can also add raisins if you like--I may try mini chocolate chips one of these days!)

  • First, mix together your wheat bran and buttermilk, and let it stand for 10 minutes. While you're waiting, preheat your oven to 375 degrees, and grease a muffin pan (this recipe will make 12 muffins).

  • Next, mix your applesauce, egg, sugar and vanilla together, and add to the buttermilk mixture. In a separate bowl, sift together your dry ingredients (your flour, baking soda, baking powder, and salt). Fold flour mixture into buttermilk mixture until just blended--remember not to over-mix! Fold in raisins or chocolate chips if you are using them, and use an ice cream scoop to pour the batter evenly into the prepared muffin pan.

  • Bake for 15 to 20 minutes, or until a toothpick inserted into the center of a muffin comes out clean.

  • Finally, enjoy your moist, apple-y bran muffins--and the feeling that you are eating something good for you!


10.10.2011

Pumpkin Bagels

It's fall, and time for some recipes to match the season! Of course, that means I get to use one of my all-time favorite ingredients: pumpkin! I began to look into this particular recipe, the pumpkin bagel, because my husband could not find a pumpkin bagel at Dunkin Donuts. I had never made a bagel, and I tend to hesitate before attempting a yeast bread recipe (the doughnuts I made seemed to take forever), but it seemed like a perfect fall recipe and would make my husband happy, so I gave it a go with a recipe found here.

And you know what? It was delicious...and super easy!!! I hope you give these a try!


First, as stated on the website, you will need the following:

Dough:

  • 1/2 cup + 2 Tablespoons warm water (100-110 degrees)
  • 3 1/4 tsp instant yeast
  • 1/4 cup + 2 Tbs brown sugar
  • 1 tsp salt
  • 1/2 cup canned pumpkin
  • 1 1/2 tsp ground cinnamon
  • 1/4 tsp ground cloves
  • 1 1/2 tsp nutmeg
  • 3/4 tsp allspice
  • 3 cups bread flour
To cook:
  • 3 quarts water
  • 2 Tbs sugar
  • 1 tsp cinnamon (I used pumpkin pie spice)
  • 1 egg, for egg wash
First, combine all the dough ingredients in a large bowl, with the exception of the bread flour. You will want to use instant yeast if you can find it--I did not, and it took my dough a bit longer to rise. When these ingredients are well integrated, add the bread flour a little at a time, mixing until it is just incorporated (you never want to over-mix a dough). I did this by hand, but you could also use a stand mixer if you have one--just use the dough hook attachment.

Turn the dough out onto a floured surface and knead for 10-12 minutes. The dough will start out a bit dry, but will come together by the end of the kneading process. Place kneaded dough in a greased bowl, turning once to make sure all sides of the dough are greased, and let sit for an hour.

Once the dough has sat for an hour, punch it down in the bowl and then divide it into 8 equal pieces. Use your hands to shape each piece into a bagel shape (roll it into a ball, create a hole in the middle with your fingers, then flatten the dough). Place bagels on a greased baking sheet for another 45 minutes to an hour to allow them to expand in size.

Finally, it is time to cook the bagels! First, preheat your oven to 400 degrees and bring a large saucepan full of water and 1 tablespoon of sugar to a boil. Drop in two to three bagels at a time and boil the bagels on each side for 1-2 minutes. Remove from water and set on a greased cookie sheet. Once they have all been boiled, brush the tops of each bagel with egg wash and sprinkle sugar and either cinnamon or pumpkin pie spice over the top. Bake in the oven for 15 minutes or until golden brown.

And voila! You have homemade pumpkin bagels--add a little cream cheese mixed with cinnamon, and you have a delicious breakfast that practically screams fall. Enjoy!


9.07.2011

Healthy Blobs

I know, I know--the title sounds less than appealing. But, that was what Melanie called them on dietriffic, so I am going to use her title. Don't let the strange name send you running, however; I know that I was skeptical of these at first too, but I really needed a new breakfast idea that I could quickly grab in the morning, and these ended up being tasty and filling! (It also helps to use up any remaining cornflakes you have from your cornflake chicken recipe)

You will need:
-1/2 cup peanut butter
-1/4 cup dried milk (I omitted this--I cheaped out on the extra $7)
-2 tablespoons honey
-3 cups of corn flakes 

To make, simply mix all of the above ingredients together by hand carefully, then separate the cornflake mixture into ten little cornflake blobs. I packaged mine individually in saran wrap for ease of transport and minimal mess and placed them in the freezer to help them hold together better. 

Now I will say that, if my blobs were out of the freezer for too long, they would sort of fall apart into little peanut-buttery corn flake baby blobs--still incredibly tasty, but not exactly a one-handed snack--so they might have held together better had I used the dried milk or crushed the cornflakes first. Since I have a psychological block on paying an extra $7 for dried milk when I already have the liquid variety for half that, I will probably continue to make mine the same way--but if you try a variation, please let me know how they work out for you!

Either way, paired with a glass of milk, they kept me full until lunch and were a sweet way to begin my day. So, give healthy blobs a shot at breakfast, and enjoy!

8.14.2011

Banana Bread French Toast with Mashed Potato Pancakes

Growing up, we HATED eating up the leftovers from the previous night's dinner. Now in part, this is due to the fact that neither my sister nor I could cook all that well at the time--it was enough to get through the meal the first time, let alone face it twice. Of course, had I known that you could make the recipes I am about to share with you, we would have skipped the original meal altogether!

First, I had a few remaining pieces of Sarah's Banana Bread leftover from about a week and a half ago. As you can well imagine, the bread was starting to get a bit stale--so, I decided to make some banana bread french toast! To make this, you will need the following ingredients:

-Stale banana bread (week old or so)--sliced 
-2 eggs, lightly beaten
-Splash of milk
-Pinch of salt
-1 tablespoon of sugar
-1 teaspoon of cinnamon
-1/2 teaspoon of nutmeg
-1 teaspoon of vanilla extract
-1 tablespoon butter

First, mix all ingredients except for the butter and banana bread in a shallow dish (I used a pie tin). Place the slices of banana bread face down in the egg mixture and allow to sit for 3-5 minutes. This will give the bread some time to soak in the egg mixture. Flip the bread over and allow the other side to soak in the mixture for about three minutes as well. In the mean time, melt the butter in a large skillet over medium-high heat.

Finally, place the slices of banana bread into the skillet. Let them sit for 2-3 minutes, and when they are lightly browned on one side, flip the slices over. Cook for an additional minute or two, until the opposite side is brown. See below:


 When both sides are browned, remove from the skillet and plate!


Mmmm...buttery, eggy, banana-y goodness! Serve with powdered sugar. You can choose to use syrup, but between the bananas, chocolate chips, and sugar, this dish is already pretty sweet. My husband was not a huge fan (as I mentioned in the banana bread blog entry, he likes banana bread--just not bananas). According to him, "It was too banana-y; [the french toast] accentuated the banana-ness." I will take that as a compliment!

The final, delicious leftover is pictured below with two cheesy, mashed potato pancakes, which I will explain next:


Now onto the potato pancakes! I found the idea for these watching a Rachel Ray show and checked out the recipe online. I usually read through the comments at the bottom of any recipe (people often comment about their challenges while making the recipe and ways to improve upon it), and the comments on this one left me a bit apprehensive. Most of the posters struggled with the potato pancakes falling apart, just staying mushy and not solidifying, etc. and, having failed to make a tasty boxty (an Irish potato pancake) in the past, I was worried I was going to waste my time and potatoes this morning. However, I am proud to say (and my Irish ancestors should be as well), that I made AWESOME potato pancakes this morning. And soon, you will too.

A quick word on this recipe: these are not traditional potato pancakes. They are not made from shredded potatoes destined from the start to become potato pancakes, and they have no flour. Otherwise, they are potatoes, cake-shaped, and made in a pan, so they still count! Here is what you need:

-2 cups of leftover mashed potatoes (I used my pierogi filling extras from an earlier blog entry)
-1 egg
-1 tablespoon butter

That's seriously it. How easy, right?

First, mix together your mashed potatoes and egg. You ideally want to use leftover mashed potatoes, because you want them to be cold and a bit stiff for the recipe. Freshly-cooked potatoes are fine too, just give them some time to cool off in the refrigerator before you use them.

Next, melt your butter in a large skillet over medium-high heat. Using a large spoon, gather up a heaping spoon's worth of mashed potatoes and drop them in the skillet. Flatten the potatoes into a potato patty about an inch thick, then repeat for another two patties (or as many as will fill your skillet, if you chose to make yours smaller). I was able to get 5 potato pancakes (about 3-4 inches in diameter) total out of my mashed potato/egg mixture.

See? They just look like little heaps of mashed potatoes:


Here is the key to perfect mashed potato pancakes: once they are flattened, put the lid on your skillet and leave them alone for 8 minutes. I am not kidding on this. Do NOT NOT NOT try to move them at all during those 8 minutes. Read my blog, facebook stalk someone, reflect on the mysteries of life, but leave the pancakes alone! If you try to move them before the 8 minutes are up, they will not be able to crust up on the bottom and become pancake-y, and you will have a weird, half-pancake/half-mashed potato combo that will not impress anyone. So leave them be.

Once the 8 minutes are up, however, get a spatula and carefully flip the mashed potato pancakes over. Note that the top and middle of the cake are all still mashed potato, however--and, hence, not solid yet--and set the pancakes back into the skillet carefully to cook the other side. I stupidly forgot to check the time once I flipped them back over, but I know they cooked for at least 6 minutes on the other side too. This is how the potato pancakes should look after the flip--just look at that color!


If you want to cook your pancakes in several batches, or just have several dishes to make, you can always keep these warm in the oven (I technically made these and then went back and made the french toast). Just preheat your oven to 200 degrees and place your pancakes on a rack so that the air can circulate around them (keeping them crisp and not soggy).


When you're ready to eat, plate them and serve with a little side of sour cream or applesauce. My husband wasn't a fan of the french toast, but he did eat three of these and loved them. So give them a try, and remember that you CAN enjoy your leftovers!

8.10.2011

Potato and Cheese Frittata

Eggs and I had a bit of a love-hate relationship this summer. I began the summer low-carb dieting (not healthy, not tasty, and definitely not blog-worthy--you can only post "put some chicken on some lettuce" so many times...), and eggs were a great breakfast for a low-carb dieter. However, I made the mistake of cooking eggs in some leftover bacon grease one morning, and all I could taste was toasted fattiness, triggering feelings of nausea for a good month whenever I so much as thought of an egg. 

But then, the egg begged me for a second chance, dropping the recipe for an egg and manchego cheese frittata into my lap. And I was able to put the past behind me and love the egg once more.

I actually came across the recipe in the cookbook Vegetarian Basics by Cornelia Schinharl and Sebastian Dickhaut. I tried to be a veggie for a brief time, but missed Taco Bell too much and quit--still have the book though. I'm glad I kept the book, too, because the frittata was AWESOME!

Now, I could list their ingredients for you, but I changed almost all of them (their directions and general idea of putting potatoes into an egg type deal were still very inspiring), so I will just tell you what I used:
-2 large Yukon gold potatoes
-2 tablespoons olive oil
-2 garlic cloves (minced)
-1 cup shredded cheddar cheese 
-8 eggs (medium-sized)
-Salt and pepper
-1 bunch green onions (reserve some for garnish)
-Chopped tomato for garnish
*I also ignored the cookbook's title and added four slices of centercut bacon. Just don't tell Cornelia and Sebastian...

First thing's first: if I were to make this frittata again--and I will make it again--I would try harder to find manchego cheese or at least substitute in a milder cheese. The cheddar stood out too sharply and just didn't seem...sophisticated enough for the dish. Same with the green onions--when I make this dish again, I will substitute in a Vidalia onion sauteed in a little butter instead to help the flavors meld a bit better. That said, this was still tasty. So, you have your ingredients:


First, peel your potatoes and cut them into thin slices--think scalloped-potato slices. Heat the oil in a skillet and cook your potato slices over medium heat (about 8-10 minutes, until they are soft). Here is where I would also slice and cook my Vidalia onion in butter (or you can chop and add in your green onions here as I did in reality), as well as any additional veggies if you'd like to add them in! Add the minced garlic (and crumbled slices of bacon if you want to defy the purpose of the cookbook like I apparently did) to the skillet, as well.

In a separate bowl, crack your eggs and whisk lightly. I chose to add my cheese here, since I just used shredded cheddar, as well as my salt and pepper. Had I found manchego cheese, I would have sliced it and added it to the layers of potato and onion in my skillet, not to my eggs. Only add 3/4 cup here--save the remaining 1/4 for the top of the frittata.

Here, I deviated from the cooking directions of the book (which involved cooking each side of the frittata for 10 minutes....there was flipping and it seemed complicated). Instead, I remembered a chef on a cooking show I'd seen earlier in the summer (it wasn't a food network guy, so I am afraid I can't identify or properly cite him) make a frittata and followed his method. So here's what you do:

First, preheat your broiler, then add your eggs to your skillet of potatoey goodness. Gently, cook the eggs for a few minutes as though you are scrambling them (i.e. use your spatula to pull the liquid egg away from the edges of the pan, till you start to see little bits of cooked egg forming in the skillet). When about half the egg looks cooked, but there is still liquid egg in the pan, leave it sit on the stove for one minute (to allow the egg on the bottom of the pan to set up), then top the frittata with the remaining 1/4 cup of cheese and place it under the broiler.

Watch the frittata closely, because it only needs about 5-7 minutes to finish cooking (and no flipping necessary!). When the egg has solidified and the cheese is melted, remove from the oven. Let it rest and completely finish cooking on the counter for a minute or two, then turn the frittata out on to a plate.


Finally, slice, serve, and enjoy for a yummy breakfast or for dinner as a variation on La Tortilla Espaniola for you tapas lovers!

8.08.2011

Homemade Pop-Tarts

Last week, Sarah invited me to bake with her because she found an awesome recipe for Homemade Pop-Tarts. Great company AND sweet treats? Who could say no to that?? Now, the recipe calls for the following ingredients for a set of cinnamon and a set of strawberry pop-tarts:

For the pastry crust:
2 cups all-purpose flour
1 tablespoon granulated sugar
1 teaspoon salt
1 cup (2 sticks, or 8 ounces) unsalted butter, cold and cubed
1 egg
2 tablespoons milk
For the cinnamon sugar filling (amount for 8 pop-tarts--adjust as needed):
½ cup light brown sugar
1½ teaspoon ground cinnamon
4 teaspoons all-purpose flour
For the strawberry filling (amount for 8 pop-tarts--adjust as needed):
¾ cup strawberry jam
1 tablespoon cornstarch
1 tablespoon water
However, the beauty of a homemade pop-tart is that the filling can be whatever your hungry little heart desires. So, we made: 2 cinnamon sugar, 2 raspberry, 2 fig (I told you I was going to use those preserves again!), and 2 nutella pop-tarts. Mmmm! The raspberry and fig are made in the exact same way as the strawberry (with preserves, cornstarch, and water), and the nutella needs no added ingredients.
We also ended up making an icing for the fruit-y pop-tarts and covered the nutella in powdered sugar, so you might also want to have the following on hand for this Icing recipe:
-2 cups powdered sugar
-1.5 tablespoons of softened butter
-1/2 teaspoon vanilla extract
-1/4 teaspoon of salt
-3 to 4 tablespoons of milk


First, make your pastry dough. As per the recipe, "To make the crust, whisk together the flour, sugar, and salt. Using your fingers or a pastry blender, work in the butter until it is the size of peas and the mixture holds together when you squeeze it. Whisk together the egg and milk and add to the dough. Mix together with a fork until everything is evenly moistened. Knead briefly on a floured surface, if necessary, until the dough comes together." Sarah was able to perform this step brilliantly without the use of a pastry blender, so don't worry if you don't have one. Divide the dough in half.


And this is admittedly, where we made a crucial mistake. The recipe on the website says that you can refrigerate the dough for up to 2 days or just keep working, and that if you do decide to refrigerate, to bring the dough back up to room temperature before rolling out. If we were to make the recipe again (which I feel fairly certain we will--it was SO good!), we would without a doubt refrigerate for a good hour or so. Since you will be rolling out the dough to 1/8 inch thick, it easily falls apart at room temperature. So learn from us and refrigerate first!

While the dough is setting up in your refrigerator, prepare your fillings. For the fruity ones (the strawberry, raspberry, or fig preserves), put your preserves into a small saucepan, then mix together and the cornstarch and cold water separately and add to the preserves. Bring to a boil and then let it simmer for 2 minutes (or until it is thickened). For the cinnamon and sugar, simply mix the ingredients together in a bowl (note: it may be easier for you to microwave the brown sugar first if it has been sitting in your pantry for awhile). And for the Nutella...just try not to eat it out of the jar while you are waiting for your dough. That may be the hardest step of the entire process.

Now, once you have refrigerated your dough and made your fillings, it is time for assembly! Lay out one half of the dough on a non-stick baking mat or on a sheet of wax paper that you have sprayed with cooking spray to prevent sticking. Place another piece of wax paper on top of the dough, and use a rolling pin to roll the dough out to a 1/8 inch thickness. Try to keep the shape of the dough as rectangular as possible to make the standard pop-tart shape, but know that you can always re-roll the scrap dough into rectangles if your shape is imperfect. Ours was imperfect and took a few re-rolls.

Using a knife or pizza cutter, cut the rolled dough into 8-10 rectangles, depending on what you are able to get out of your dough (we ended up with 8 pop-tart rectangles). Transfer your dough rectangles onto a baking sheet. Then, place about 1.5-2 tablespoons of your selected fillings on top of each one. Be sure to leave a good 1/2 inch open around the edges. Lightly beat one egg, then carefully brush the egg on around the edges of your pop-tarts' fillings. This will act as a glue when the tops of the pop-tarts are placed on top of the bottoms. See below:


Repeat the dough roll-out process with the other half of the dough for the tops of the pop-tarts, then place the  second set of dough rectangles directly on top of the first. Use a fork around the edges to seal the pop-tarts, and puncture the top of the pop-tarts a few times so that steam can escape (and they will not explode while baking). Then refrigerate the pop-tarts for 30 minutes to set up.

Pre-heat the oven to 350 degrees, and take the pop-tarts out of the refrigerator. Pop them in the oven for about 25-30 minutes (ours took the full 30) and get your toppings (if desired) ready.

To make the icing, simply mix together the powdered sugar, salt, vanilla extract, and butter. Then, one tablespoon at a time, add in the milk until you have your desired consistency (spreadable, but not runny). You can also have extra cinnamon-sugar and powdered sugar on hand for the non-fruity pop-tarts.

The pop-tarts should be crisp and flaky when finished, like so:


Allow them to cool, and then decorate! We chose red sprinkles for the raspberry pop-tarts and gold for the fig pop-tarts. Cinnamon-sugar pop-tarts received an extra sprinkling of cinnamon-sugar, and we figured that the nutella were already fairly decadent and gave them a sprinkle of plain powdered sugar.

Let me tell you: these tasted AMAZING. This was easily my favorite recipe for the summer. The fruity ones taste like you are eating your own mini-pie, anything with nutella is delightful, and the cinnamon-sugar just brought out the buttery, flakiness of the dough. Eating these put us into such a state of bliss...I swear I was a better human being for at least that hour (not that I was eating them for an hour--the effects of the pop-tart bliss made me feel happier for at least an hour after eating them....I promise I only ate the one...stop looking at me :p). Anyway, do yourself a favor and make these--you'll never want the boxed version again. Thanks again to my fabulous co-baker Sarah, and we both hope that you make these and enjoy!


7.15.2011

Homemade Doughnuts!

One of my guilty slack-off pleasures as a newlywed is to troll www.thenest.com: a website with information on housing, cooking...and politics/current events. An unexpected combo to be sure, but it keeps me entertained. One of the message board posters there had a plate of delicious-looking homemade doughnuts in her signature, and it looked like something I needed to try! I located a recipe here: http://allrecipes.com/recipe/crispy-and-creamy-doughnuts/detail.aspx

Now, these donuts come out more like a standard Dunkin Donut, if you have those in your area (i.e. a bit lighter than a cake donut). This recipe also only calls for glazed donuts; I had a taste for cinnamon sugar ones, since my husband and I often buy these from our local farms/pumpkin patch type places, and they are always SO good! So, I will tell you how to make both! First, the ingredients:


  • Dough
  • 2 (.25 ounce) envelopes active dry yeast
  • 1/4 cup warm water (105 to 115 degrees)
  • 1 1/2 cups lukewarm milk
  • 1/2 cup white sugar
  • 1 teaspoon salt
  • 2 eggs
  • 1/3 cup shortening
  • 5 cups all-purpose flour
  • 1 quart vegetable oil for frying
  •  
  • Glaze
  • 1/3 cup butter
  • 2 cups confectioners' sugar
  • 1 1/2 teaspoons vanilla
  • 4 tablespoons hot water or as needed

Cinnamon-Sugar topping
1/3 cup butter
3/4 cup white granulated sugar
2-3 tbs cinnamon (or more, to your taste)

To begin, cut open the yeast packets, and sprinkle them over the warm water. Let the mix sit for five minutes or until it becomes foamy. Now, this was my first time cooking with yeast, and I learned a few things about it. One, temperature is hugely-important. Yeast needs the water to be warm and it will need a warm environment in the kitchen to rise at a decent pace. So, you may want a 75-80 degree kitchen today (I stupidly had my air conditioning turned on full blast on a 70 degree day, and my dough took a good hour and 45 minutes to rise. Learn from my mistake!!). Second, yeast is a fungus, and so it is a bit smelly. Just keep imagining fresh doughnuts in your head as you smell the yeast-i-ness, and you will make it through.

Next, mix the following in a large bowl: the yeast mix, milk, sugar, salt, eggs, and shortening. Use a whisk to make the integration of the shortening easier. When all is combined, add in the flour to the mix in 1/2 cup intervals, again whisking to remove any lumps. You can also use a hand mixer set on low speed if the spoon isn't working for you (I just figured mixing by hand would help cancel out the future doughnut calories :p).

When it is well-mixed, knead the dough for about five minutes, then place it into a greased bowl and cover lightly (saran wrap works well here--just be sure to spray with non-stick spray and cover loosely). Finally, leave the dough alone to rise. It will be ready for action once it is about double its original size and will leave an indentation if touched (if it springs back into its original place when touched, it needs more time).

Once the dough has doubled in size, it is, as they say, time to make the doughnuts! First, prep your space. The recipe calls for you to roll the dough out onto a hard surface, and the dough was still obstinately sticky for me when I uncovered it. So, I taped some saran wrap to my counter top and sprayed it with non-stick spray and sprinkled it with a bit of flour. I highly suggest doing something similar to keep your dough from sticking. Then, place your dough on this surface, cover it with a piece of wax paper, and roll out your dough with a rolling pin on top of the wax paper, until the dough is a 1/2 in. thick (be sure to use the wax paper to keep the dough from sticking to the pin). Use a doughnut cutter to make your dough into the well-loved doughnut shapes (or, as I did, a drinking glass and a small, circular piece from a pastry bag--cooking is all about innovation after all). Finally, allow your doughnuts to again double in size until they look like the ones below:


Finally, it's time to cook the doughnuts and make your toppings. I made the doughnuts first and then went back to make the glaze and such after--the doughnuts fry up very fast, so you may want to devote all your attention to them first. Heat the oil in a skillet (or a deep fryer if you have one) until it reaches 350 degrees (or until a wooden spoon placed in the center of your oil starts to have little bubbles coming up around it--in case you don't have a thermometer). Using a spatula, slide the donuts (2-3 at a time) into the oil, flipping them over as soon as they achieve a light golden color on one side. Once they are golden on each side, remove them and set them on a wire rack to cool (just be sure to place a cookie sheet underneath to catch the mess!).

Toppings are up to you, but here is a glaze option and a cinnamon-sugar option. For the glaze, melt the butter in a saucepan over medium heat, and then add in the confectioner's sugar and vanilla. This is going to thicken up and become frosting-like in consistency, so you will need to add a tsp or more of hot water to thin it out. A little goes a long way, so be sure to only add one tsp at a time until the glaze is thin enough to be drizzled over the doughnuts. Then, simply drizzle over the doughnuts as they cool on the wire racks, and feel free to add fun embellishments like sprinkles!

The cinnamon sugar topping is even easier. Simply mix together your sugar and cinnamon in a bowl and melt the butter in a separate dish. Brush the butter onto the top of the doughnuts and place them into the cinnamon sugar mix--the butter will act as a glue to keep the cinnamon and sugar on the doughnut. Cover the other side of the doughnut in butter and dip the other side in the mixture. (Alternatively, you can place the cinnamon and sugar in a paper bag and shake it to cover all surfaces of the doughnut). These were my favorite, though the glazed were very good, too.

And the final result: time-consuming, but oh so yummy! Enjoy!